https://www.learnopencv.com/install-opencv3-on-windows/
Install OpenCV 3 on Windows
In this post, we will provide step by step instructions on how to install OpenCV 3 (C++ and Python) on Windows. However, we have found that a lot of readers want to install for python only. So, if you want to install OpenCV 3.3 for python only, please foll
www.learnopencv.com
Windows 10 환경에서 Visual Studio 에디터의 C++ OpenCV 설치
Installation of C++ OpenCV in Visual Studio of Windows 10
1. Visual Studio 2015 설치
1.1 link 다음링크에서 Visual Studio 2015 Download
1.2 Custom type of installation
1.3 Visual C++ / python / web development tools 선택
2. CMake 설치
2.1 https://cmake.org/download/ 에서 v3.10.0 다운로드
2.2 'add cmake to the system PATH for the current user' 선택
3. Anaconda 설치
3.1 https://www.anaconda.com/products/individual/get-started 64bit 용 설치프로그램 다운로드
3.2 'Add anaconda to my path environment variable' 선택

4. opencv-3.3.1 와 opencv_contrib-3.3.1 다운로드 및 압축풀기
4.1 https://github.com/opencv/opencv/releases 에서 opencv-3.3.1 source code zip 다운로드
4.2 https://github.com/opencv/opencv_contrib/releases 에서 opencv_contrib-3.3.1 source code zip 다운로드
4.3 내 문서에 (가능하면 같은 폴더내에) 압축해제

5. opencv-3.3.1 폴더가 곧 OPENCV_PATH
ex) [ C:\Users\hyun\Documents\opencv-3.3.1 ]
6. CMake를 이용한 비쥬얼스튜디오 프로젝트 생성
6.1 CMake 실행
6.2 소스코드 C:\Users\hyun\Documents\opencv-3.3.1 입력 및
빌드폴더 C:\Users\hyun\Documents\opencv-3.3.1\build 입력
6.3 configure 실행 및 확인누름
6.4 Visual Studio 14 2015 Win64 선택후 Finish
7. CMake config에 추가적인 수정
7.1 “INSTALL_C_EXAMPLES” , “INSTALL_PYTHON_EXAMPLES” 선택
7.2 “OPENCV_EXTRA_MODULES_PATH” 항목에 C:/Users/hyun/Documents/opencv_contrib-3.3.1/modules 입력
7.3 BUILD_opencv_saliency 체크 해제 (나의 경우 관련 항목 없었음)
8. 빌드파일 생성하기
8.1 만약 CMAKE가 에러없이 Configuring done 메시지를 띄웠다면 generate를 클릭
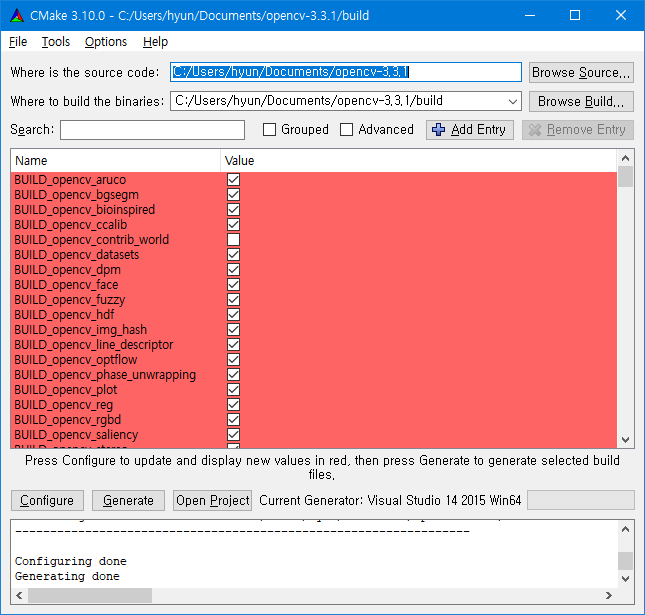
※ Whenever you make any changes(check/uncheck boxes or change path) to configuration generated by CMake, always click configure and generate.
8.2 Release 모드에서 컴파일하는 과정, cmd에서 OPENCV_PATH/build 폴더에서 다음의 커맨드 입력
cmake.exe --build . --config Release --target INSTALL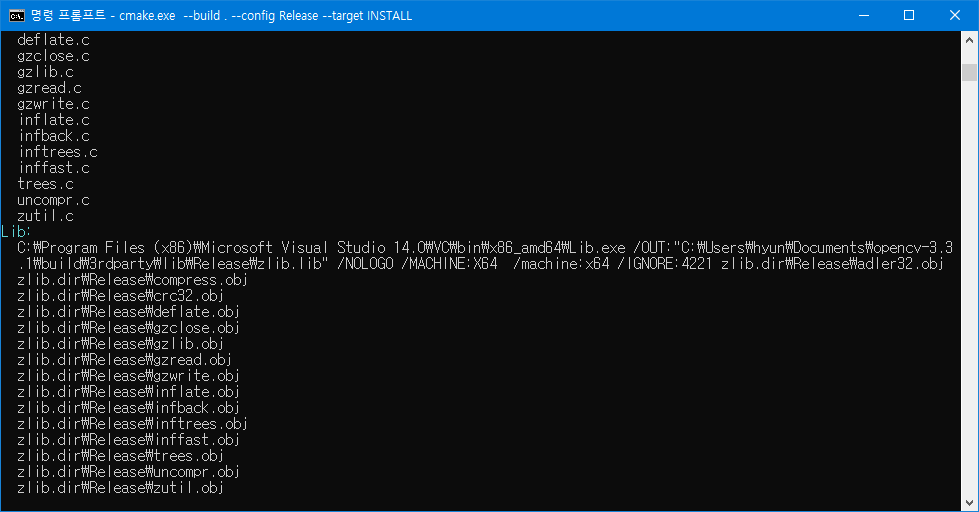
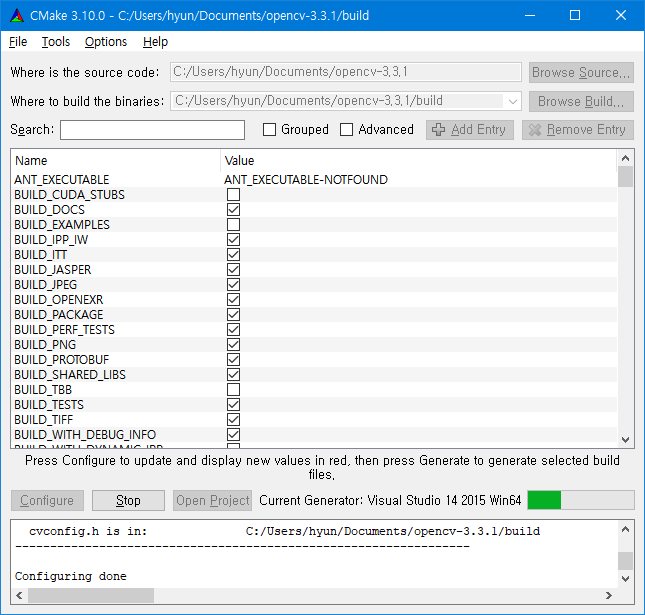
9. CMake 다시 열기
9.1 검색창에 python 입력
9.2 INSTALL_PYTHON_EXAMPLES, BUILD_opencv_python3, BUILD_opencv_python2 체크 해제
9.3 configure 클릭 후 generate 클릭
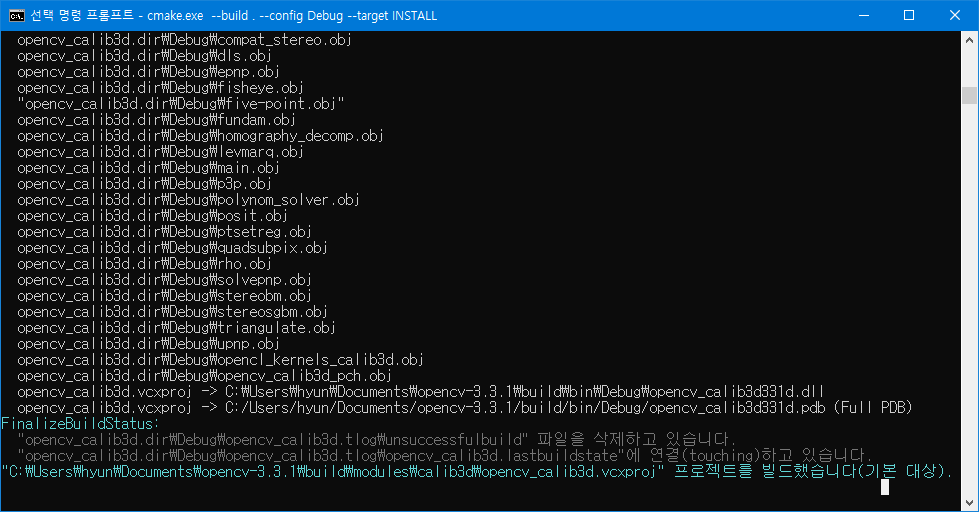
9.4 cmd에서 OPENCV_PATH/build 폴더에서 다음의 커맨드 입력
cmake.exe --build . --config Debug --target INSTALL
10. 환경변수설정
10.1 경로설정 - 윈도우키를 누르고 '환경 변수' 검색
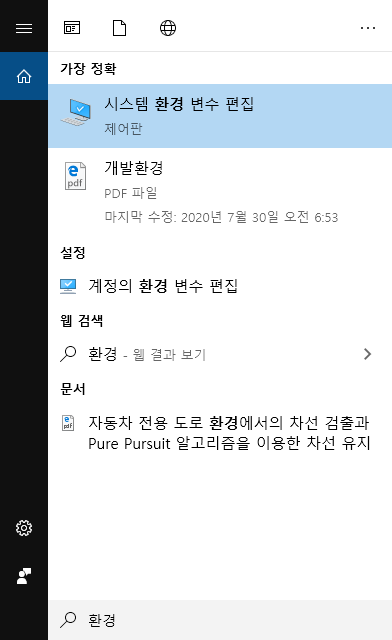
10.2 환경 변수 편집 클릭
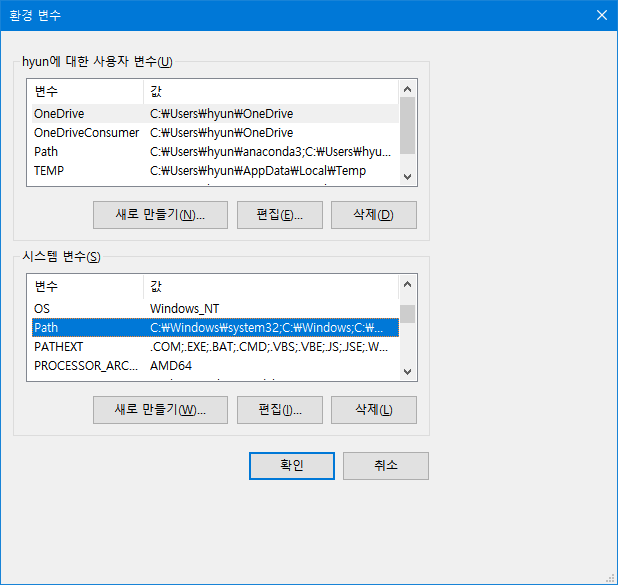

10.3 시스템 변수에서 PATH 클릭 및 새로만들기 클릭
10.4 C:\Users\hyun\Documents\opencv-3.3.1\build\install\x64\vc14\bin 와 같이 자신의 환경에 맞게 입력
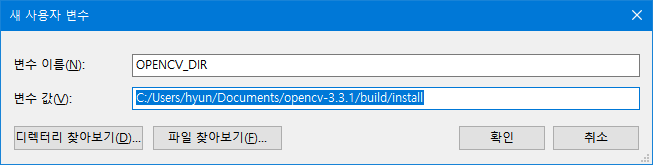
10.5 사용자 변수에서 새로만들기 클릭
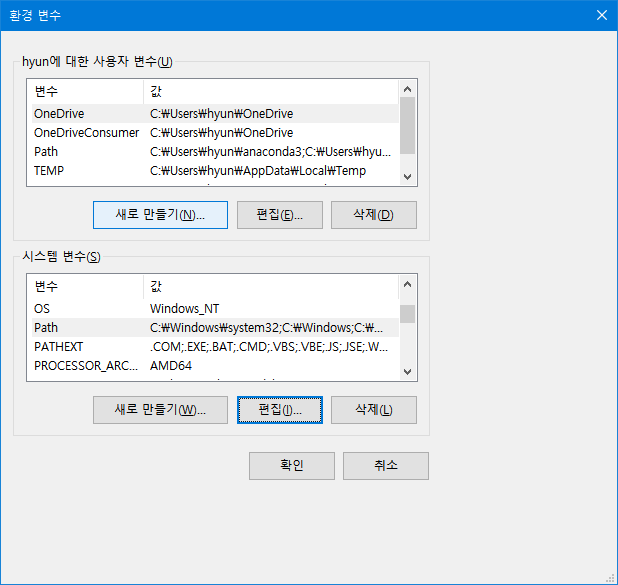
10.6 OPENCV_DIR 과 C:/Users/hyun/Documents/opencv-3.3.1/build/install 과 같이 입력
10.7 확인 두번 입력후 창 닫기
11. C++ 코드 테스트하기
11.1 www.filepicker.io/api/file/XV6a0s3HQ3ybXXhRNvVy 에서 코드 다운로드 후 폴더에 압축해제
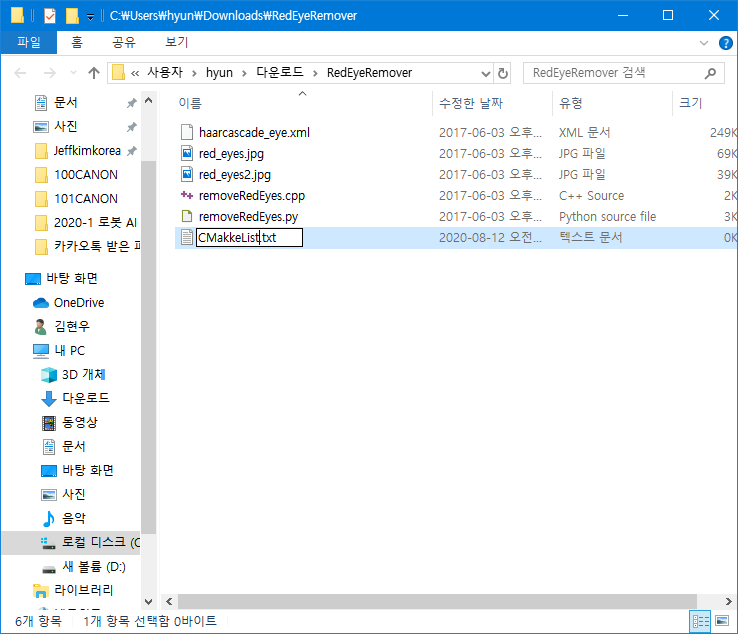
11.2 압축 푼 폴더에 CMakeLists.txt 만들고 다음 코드 입력후 저장
cmake_minimum_required(VERSION 2.8)
project( redEyeRemover )
find_package( OpenCV REQUIRED )
include_directories( ${OpenCV_INCLUDE_DIRS} )
add_executable( removeRedEyes removeRedEyes.cpp )
target_link_libraries( removeRedEyes ${OpenCV_LIBS} )
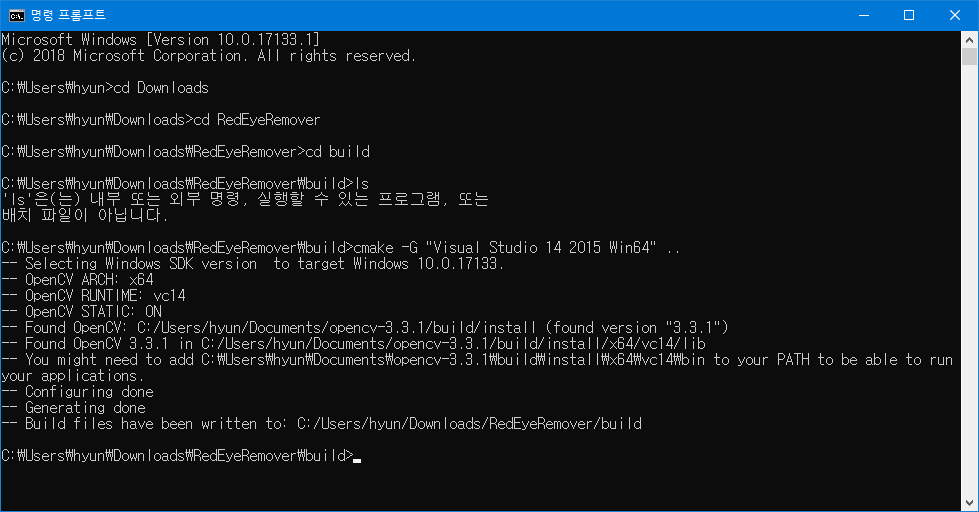
11.3 cmd 실행 후 폴더에 가서 입력
mkdir build
cd build
cmake -G "Visual Studio 14 2015 Win64" ..
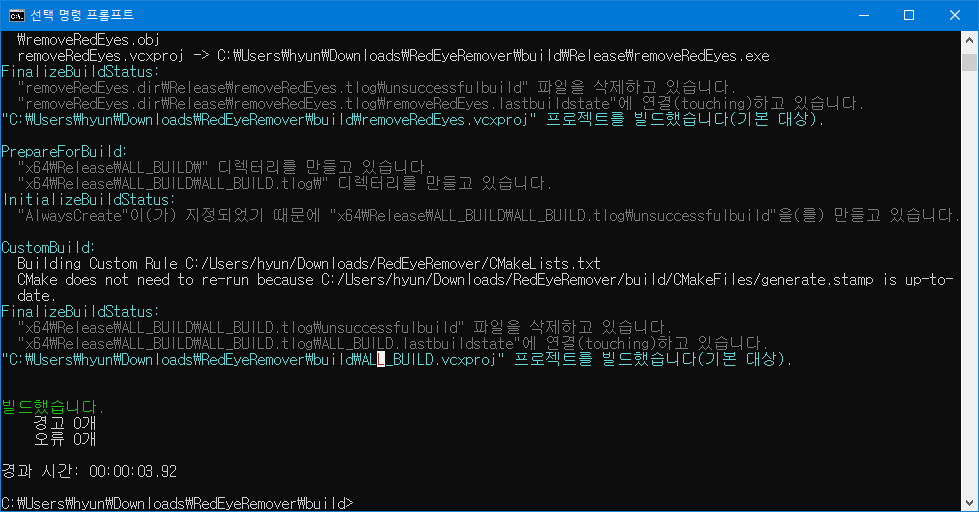
cmake --build . --config Release
11.4 상위폴더에서 removeRedEyes.exe 실행 (다음의 코드 차례로 입력)
cd ..
.\build\Release\removeRedEyes.exe
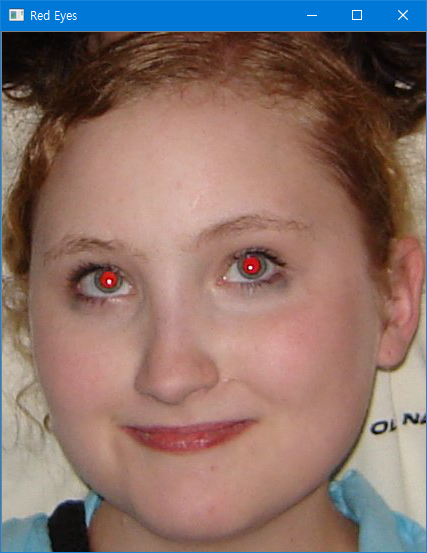

위의 사진 두개가 뜬다면 opencv가 잘 작동하는것을 확인한것입니다.
수고하셨습니다. 약1시간 반 정도 걸린것 같네요. :)
'Autonomous Vehicle > Computer Vision' 카테고리의 다른 글
| OpenCV : Euclidean Clustering White Pixels Algorithm (0) | 2020.08.26 |
|---|---|
| [TF/Keras] Keras의 VGG16 모델을 이용하여 이미지 분류하기 (0) | 2020.08.22 |
| [TF/Keras] Ubuntu 18.04 가상환경에서 TensorFlow 설치하고 Keras 신경망 라이브러리 환경 설정하기 (0) | 2020.08.22 |


